Gluten-Free Zesty Lemon Bars
- August 13, 2024

In the hot summer days, when the temperature is so high, what can be a more delightful dessert than healthy gluten-free lemon bars? Isn’t it? I bet it is!
So, today I will share with you one of my favorite dessert recipes which I named: Gluten-Free Zesty Lemon Bars. Hey, don’t worry, the recipe isn’t as long as the name I made. Making the lemon bars can be as easy as drinking water for you if you just follow my simple instructions.
Yeah! This healthy yet yummy dessert with lots of lemony flavor and mouth-melting curst is just a few steps away from you. So, without wasting any more time, dive into the following recipe and learn the easiest way to make this dessert with my customized cooking style.
Why Gluten Lemon Bars Are So Appetizing?
A summer day without lemon bars feels like a rose without its heavenly scent. Yes, that’s what my gramma used to say. And I believed her every word.
Do you wanna know why? If so, here is my reason: the day I tried these uniquely tasty cute little gluten-free bars for the first time. OH, MY GOD! They were way more tasty than I thought.
So, here are some of the reasons why I find these lemon bars very toothsome:
1. Loaded with Lemon Flavor:
This dessert recipe is not just about using a little lemon zest. It’s also filled with lemon juice. The zest adds a fresh and yummy smell and the juice brings a perfect sweet and sour taste. It’s a nectar for a hot sunny day.
2. Strong, Yummy, and Buttery Shortbread Crust:
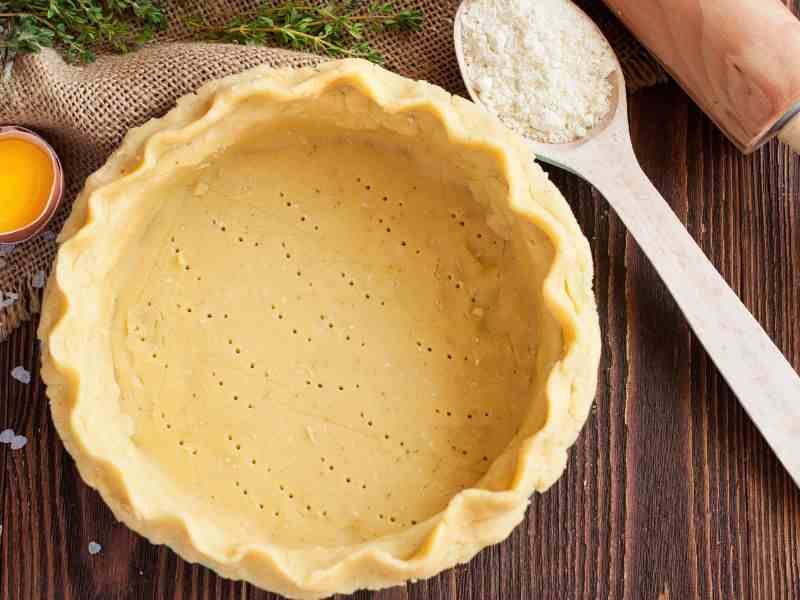
The curst of this gluten and dessert is strong enough to hold the filling yet it just melts in your mouth smoothly like butter. How?
We’ll use a healthy flour substitute like coconut flour or Almond Flour. Because this recipe is gluten-free. But don’t worry! Your lemon bar’s crust will still taste like regular flour.
And just by adding coconut oil as a dairy-free alternative, the crust will have a buttery texture without using any actual butter.
3. Perfectly Balanced Tartness:
This healthy recipe uses lemon curd filling which is gluten and dairy-free. It maintains the balance between the sweetness and tanginess of this dessert.
4. Easy To Make:
Lemon bars are easy to make and steps are so simple. With a few steps, you can prepare this desert. And the ingredients are also very common. You can find them anywhere. This recipe is a lifesaver when suddenly your guests knock at your door.
Ingredients That’ll Make the Best Gluten-Free Lemon Bars
As I told you previously, this recipe’s ingredients are very easy to gather. But the question is which specific ingredients will make your gluten-free dessert the best? From my experience, the following ingredients gave me tremendous results:
For the Crust:
- 1 ½ cups almond flour
- ½ cup powdered sugar
- ¼ cup melted coconut oil
For the Filling:
- ¾ cup granulated sugar
- 4 large eggs
- ½ cup freshly squeezed lemon juice (from about 3 lemons)
- 2 tablespoons lemon zest
- ¼ cup tapioca flour
- ¼ teaspoon salt
Substitutions:
- If you couldn’t able to find almond flour. Don’t worry. You can still make the crust with hazelnut or cashew flour in the same amount.
- Some people don’t like to use coconut oil. If you’re one of them, then use avocado oil. But using avocado oil might bring a bit of a different flavor.
- Tapioca flour can be used instead if you’re using arrowroot flour as both of them are gluten-free. And the ratio for this substitute is 1:1.
Step-by-Step Instructions to Make Gluten-Free Lemon Bars Perfectly
If you’ve gathered all the ingredients let’s start cooking. Trust me the steps are so easy that, just by following them you can prepare the best gluten-free lemon bars in no time. So, Let’s start:
Let’s Bake the Crust:
Within just following 5 steps we can make the crust like a pro. Yeah! Here they are:
Step 1: Curst prepping is a fun thing to do among all the steps. Yes! All you’ve to do is preheat your oven to 30 350°F (175°C) for about 5-10 minutes. And while your oven is heating take a square baking pan (around 8×8 inches).
Line your baking pan with parchment paper. Parchment paper will prevent the crust from sticking to the pan. Also, this paper makes it easy to clean up things after cooking.
Step 2: Now take a medium bowl and put the almond flour and powdered sugar. Then mix them together. It’s the base of your crust. You’ll need to use a fork or pastry cutter to mix until the whole mixture looks like coarse crumbs.
Step 3: So, mixing the dry ingredients is done. Now it’s time to pour the melted coconut into the dry mixture that measurements I mentioned in the crust’s ingredients section.
Step 4: After that put your crumbly dough into your lined pan and press it down evenly with your finger. You can also use the bottom of a measuring cup to make a firm crust.
Step 5: Now put the pan in the oven and bake for 15-20 minutes until the edges of the crust turn into a lightly golden color. And while you’re baking, ensure you don’t open and close the oven door too much. It’ll change the temperature which may prevent even baking.
Making the Lemon Filling
Oh! Lemon filling. Whenever I make this I start eating it before preparing the dish. So, now let’s learn how to make this luscious filling with some easy steps:
Step 1: To make the lemon filling, first take a mixing bowl and put sugar, eggs, lemon juice, and lemon zest then whisk them together. After that take another bowl and mix tapioca flour and salt there.
Step 2: Now slowly add the tapioca flour and salt mixture to the bowl with the sugar, eggs, lemon juice, and lemon zest mixture. Then stir continuously until you mix these two mixtures perfectly and get a smooth texture.
Step 3: So, if your mixture is ready, check out the curst. If it gets a golden color, then carefully pour the lemon filling over the crust. And please make sure that the filling is evenly distributed.
Step 4: Now put the pan into the oven again and bake for another 25-30 minutes. If the crust’s edges are turned into a slightly golden brown color and in the middle it becomes yellow color, take out the pan from the oven. Then, check the filling. If it’s no longer jiggling, then it’s firm enough to cut.
Step 5: This is the last step but the tricky one. Yup! You’ll need to get the corner of the paper and pull it then put it on a wire rack at room temperature. When it gets cool, peel the paper away and cut it into bars and then into square pieces with a sharp knife. Done! Your summery and zesty lemon bars are ready to please everyone’s taste buds.
Flavor Variations to Trun Your Classic Lemon Bars Outlandish
I just love to experiment with the dishes. And if it’s about any desserts then for me adding different flavors to them is my hobby. Therefore, here are some ideas for you that you can try in your gluten-free lemon bars:
- You can add basil, mint, cilantro, or dill instead of rosemary and thyme to add a bright and depth flavor to the dessert.
- Just use a bit of citrus juice. It’ll make your dessert taste fresh.
- Berries usually bring more sweetness and tanginess to any dessert. So, you can pick fresh or frozen berries and add them to your dessert.
- If you want to add flavors from different cultures, add pesto for an Italian taste, sriracha for an Asian touch, and smoked paprika if you’re a Spanish flavor lover.
Nutritional Benefits of Lemon Bars
Now, let’s explore the nutritional benefits of this gluten-free lemon bars recipe through the following table (The nutritional values that I provided may vary depending on the amount of ingredients you’ll use.):
Nutrient | Amount |
Calories | 226 kcal |
Total Fat | 14g |
Saturated Fat | 5g |
Cholesterol | 93mg |
Sodium | 67mg |
Total Carbohydrates | 22g |
Dietary Fiber | 2g |
Sugars | 17g |
Protein | 5g |
Vitamin C | 15mg (17% DV) |
Calcium | 41 mg (3% DV) |
Iron | 1 mg (6% DV) |
History of Gluten-Free Lemon Bars Recipe
During the mid-1900s, the traditional “Lemon Bars” recipe gained popularity in the United States. And in 1962 the Chicago Daily Tribune was first widely published this recipe.
But what about this recipe’s gluten-free version? Well, when people started to show their concerns about health issues like gluten sensitivity and lactose intolerance from regular flour or dairy products they simply began experimenting with alternative flours and dairy substitutes.
FAQ
Q1. Can I use other types of flour instead of almond flour for the crust?
A: Yes, you can use other types of flour instead of almond flour like hazelnut or cashew flour for this gluten lemon bars dessert.
Q2. What can I use instead of coconut oil in the crust?
A: If you don’t want to use coconut oil in the crust, you can opt for avocado oil or melted vegan butter. These two kinds of oil can provide the same taste as coconut oil.
Q3. How do I store the lemon bars and how long will they stay fresh?
A: To store the lemon bars, you’ve to let them cool completely and cut them into squares then you can place them in an airtight container. And to prevent sticking the lemon bars just separate the layers with parchment paper. You can store the container in the refrigerator for up to one week. And if you want to store them for longer like 1 or 2 months then you’ll need to freeze the lemon bars, that’s it.
Conclusion
So, this is how you can make gluten-free lemon bars easily with perfection like a chef. These lemon bars are just a heavenly summertime treat. The tangy lemon filling and the almond flour crust with a totally option make this recipe an all-time fav as it’s healthy.
I hope you’ll enjoy this while making this dessert with the simplest steps that I have shown you. And in the end, eat the lemon bars without thinking about your dietary restrictions.
Nevertheless, bye for today, and don’t forget to leave a comment about your experience after making it. So, why you are still waiting? Start preparing this refreshing dessert for enjoying the hot days. Tada!


Leave a Review